

If you’ve ever been driving around a little carelessly and happened to bump into the curb, you know the dreaded feeling of what damage you just caused. Or maybe you’re a careful driver and your tire size is causing curb rash. Whatever the situation may be, no one wants to ride around with scuffed up rims. So today, we’re talking about another Do-It-Yourself (DIY) project: curb rash on black rims and how to fix it. All it takes is a little sandpaper, some filler, spray paint, patience, and you’re golden.
If it sounds daunting, don’t worry. Luckily, it’s an easy fix, whether you want to take it to a professional and burn some cash, or do this yourself. Some drivers these days like a little DIY to learn a new skill and save some money. It may take more time, but the end result will be worth it. So, let’s go over how to fix the curb rash on your rims.
Materials needed for fixing curb rash on black rims
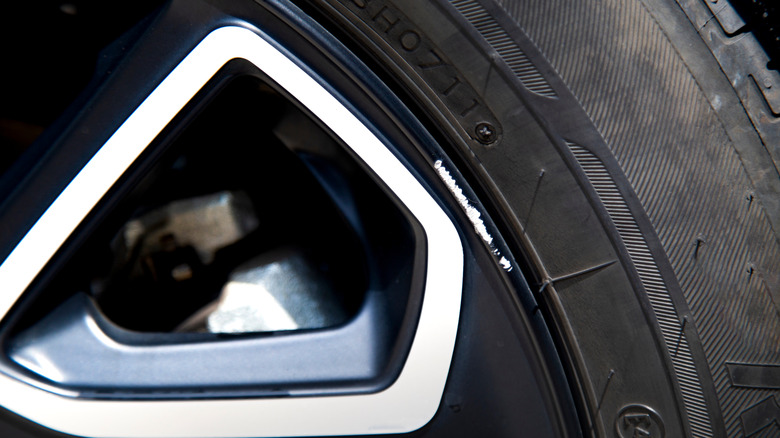
First off, let’s assess the damage. Just how bad is it? Scratches and scrapes on the rims are the usual mark of curb rash, concentrated closer to the outer edge where the rim meets the tire. Take your time inspecting each wheel carefully to get an idea of how much damage there is. It can be anywhere from minor surface scratches or scuffed paint to deep cuts and bent rims. Once you know the level of damage you’re working with, it’s time to collect the right tools.
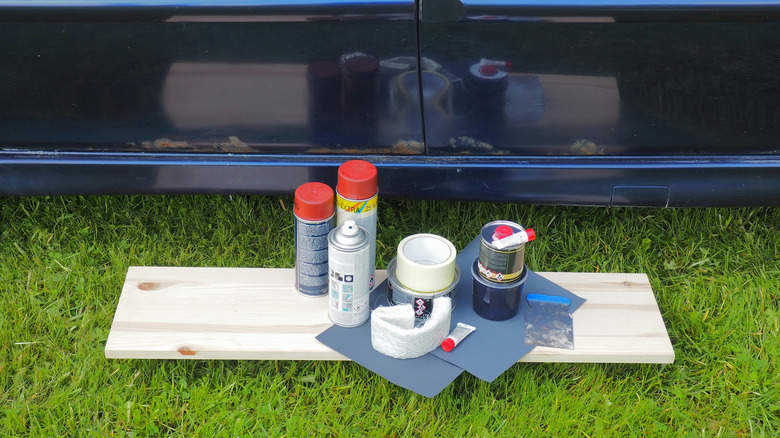
Every situation of curb rash is different, so you may not need all of these:
- Varying grits of sandpaper, from 100 to 320. Some sources even suggest up to 400 grit, but it’s better to have various grit levels to sand and smooth things out.
- Rim cleaning solution isn’t mandatory, but fixing anything is easier with a clean surface.
- Filler and hardener for any cracks or deep cuts. Putty also works.
- Spray paint to repaint the rim. For this project, we want black spray paint. Matte finish or semi-gloss, your choice.
- A rubber mallet in case you have those bent rims we talked about.
- Painter’s tape to cover up parts we’re not painting,
- Gloves, goggles, and a face mask.
Whether or not you want to pay your auto shop to remove the wheels or leave them on is up to you. Personally, we think taking them off is easier for this project, but you can also leave them on if you want.
Fixing curb rash
Start by cleaning the wheel with the rim cleaning solution. We want to prepare the rim, so we want to get it clean and then sand it down. 80 to 120 grit is not only versatile, but great for sanding in general, so we can use this to sand down the scuffed areas and even out the metal caught up in the curb rash. Next, if you’re using spot putty, you can squeeze out a small amount and spread it along the damaged area. If using filler, you may need to mix things up a bit to make sure the filler and hardener combine. Then apply and wait for it to dry.
After the putty/filler dries, it’s back to sanding. We want to sand it down and get it smooth again. 100 grit is a good bet. Don’t worry if you sand off too much, you can always reapply the putty/filter and sand again. Take your time. Go over it again, but increase the sandpaper grit to get this baby looking smooth. If your rims are bent, this would be a good time to put that rubber mallet to use. Take solid but gentle swings to avoid cracking the rims (if they’re made of aluminum).
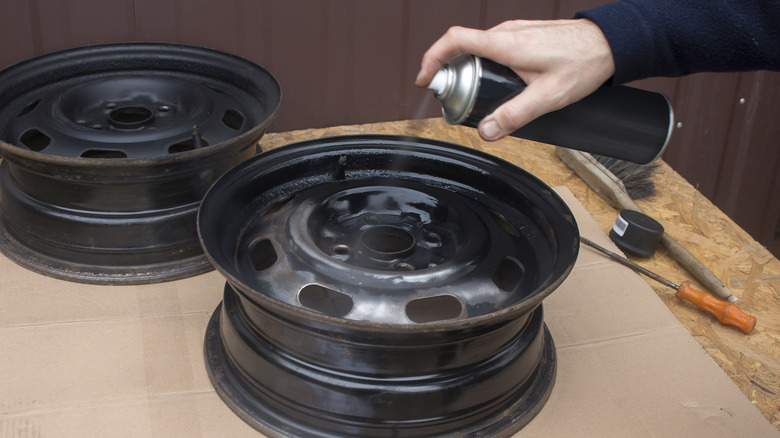
Now comes the paint job. Use painter’s tape to cover an inch or two into the tires, plus the valve stem, lug nets, tire pressure cap, and if you didn’t take the rims off, anything behind the wheel you don’t want to get paint on. Apply the paint to your rims. Multiple coats, again from light to heavy. Using some touch-up paint or a clear coat can also help protect the rims from corrosion if there’s any exposed metal. Think about investing into a rim protector to protect your rims from future curb rash.