

It has been eight months since I last wrote about the ’76 Charger, and last time, the news wasn’t that great. After two stops on Power Tour 2024, the 360 in the car, the original block to the car, the engine that had no trouble whatsoever driving to Carlisle and back from BangShift Mid-West, decided that it was time to call it a day. The 175 or so horses that were already suffering from equine asthma had laid down in protest. While the big Mopar still ran, the prognosis wasn’t good. The 360 requires a full tear-down and ground-up rebuild before it turns another wheel, in anger or otherwise.
We also showed you our solution to the problem, a 2009 Dodge Charger AHB that we got for a screaming deal. In fact, if it didn’t have the kind of rot that only Ohio seems to be capable of producing, we would’ve kept it around. But I’ve had a four-door modern Mopar, and I like the B-body a little bit better. So let’s catch you up on the progress since late last summer.
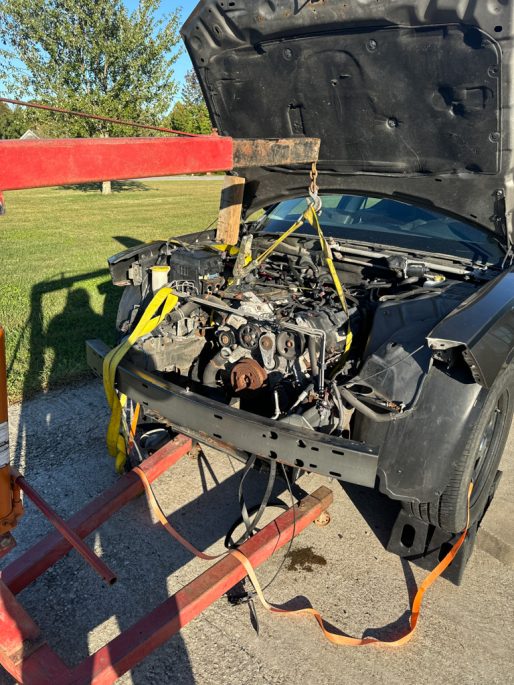
Removing the third-gen Hemi from a late-model Charger isn’t a fun process. That being said, it isn’t bad, either. One lesson learned: BUY THE ENGINE LIFT PLATE. Do NOT do like I did, which was to lift the engine using the sketchiest combination of ratchet straps possible. We sold the transmission off and sent the rest of the Charger straight to our local crusher.
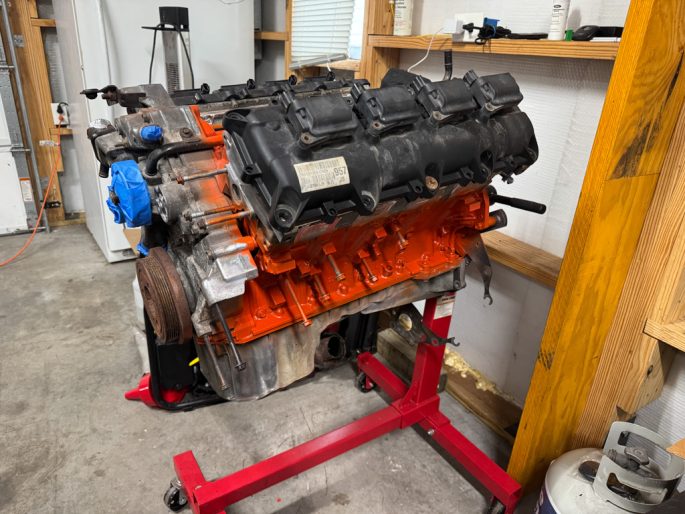
The Hemi was de-greased, quickly rattle-canned orange, and set off to the side for the time being.

Holley Performance Brands kicked in quite a few parts that will go towards the build, including swap kit mounts, exhaust manifolds, a radiator and fan system, new coil packs and more. You’ll see these added in as I get to them, but a big thank-you to Holley for their continued support!
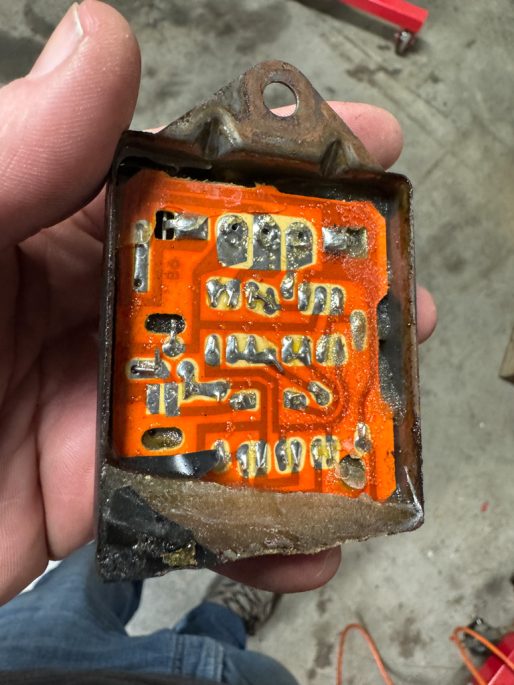
As disassembly began on the Charger’s engine bay, we took time to note any issues. Happily, electronics with melty potting, like the EGR timer here, won’t be an issue much longer.
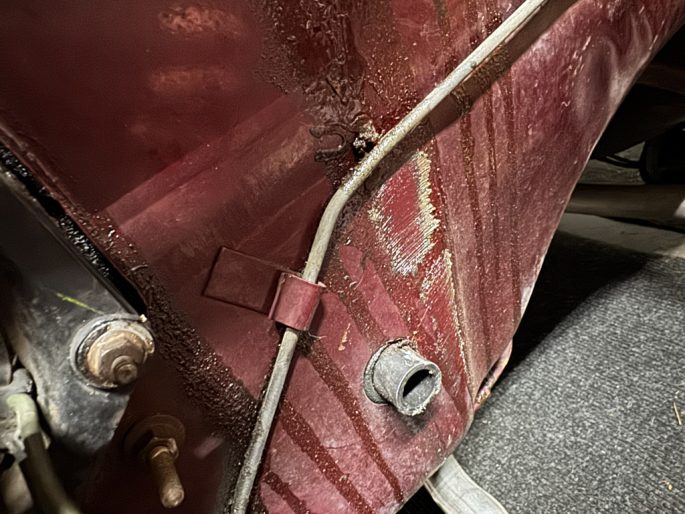
As work progressed, we made sure to identify any and every loose wire underhood. The more prepwork now, the less of a pain in the ass it is to track wires later.
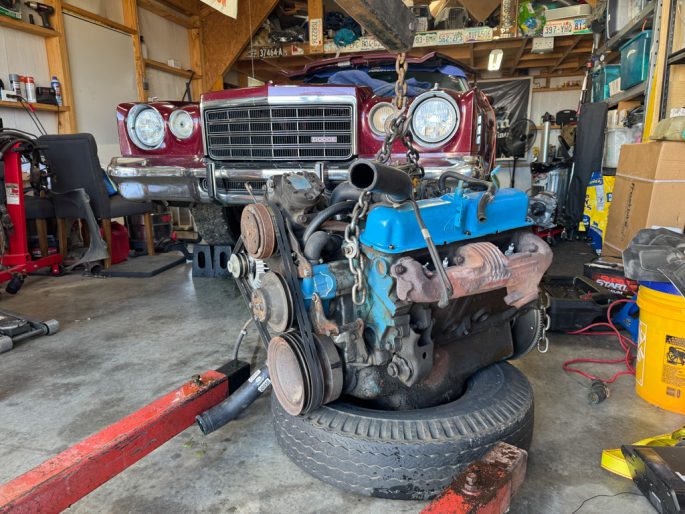
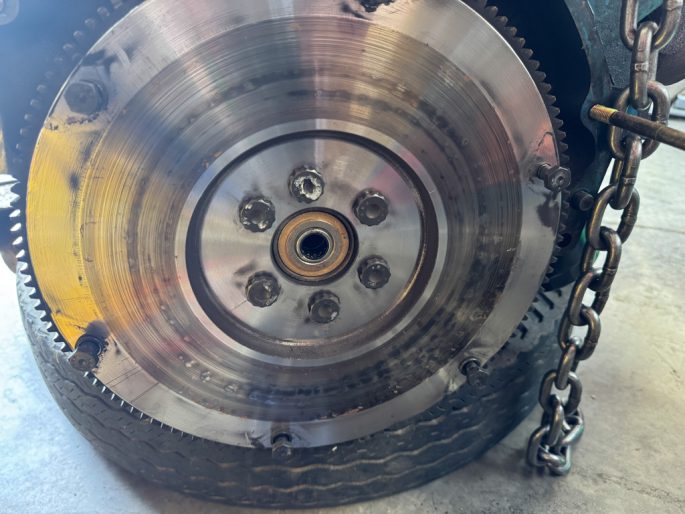
Pulling the 360 is a straightforward affair: drop the transmisson from out under the car, unplug and disconnect everything, get the radiator out of the way, loosen up the two motor mount bolts, and bolt on a chain. We will be keeping this engine around… not only are we curious as to what happened, but if it is salvageable, we may rebuild for a different project.
Dear American Powertrain: I’m sorry. I suspect that this happened before I re-geared the rear axle. There is a small chance this happened on one of the last drives, when I tried to blow up the 360 by power-shifting.
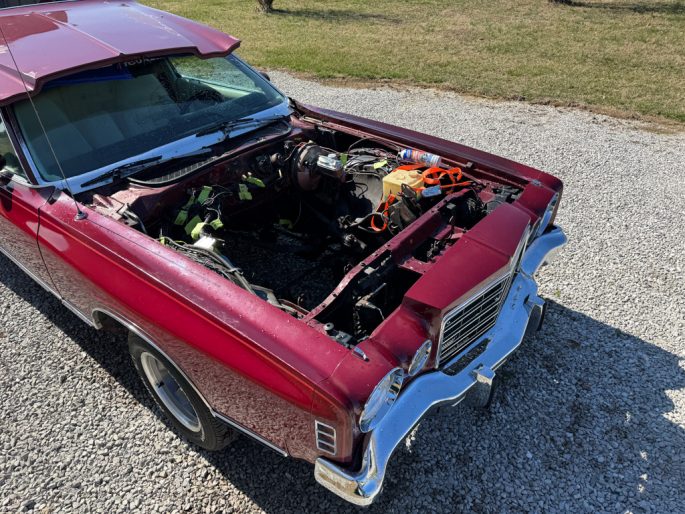
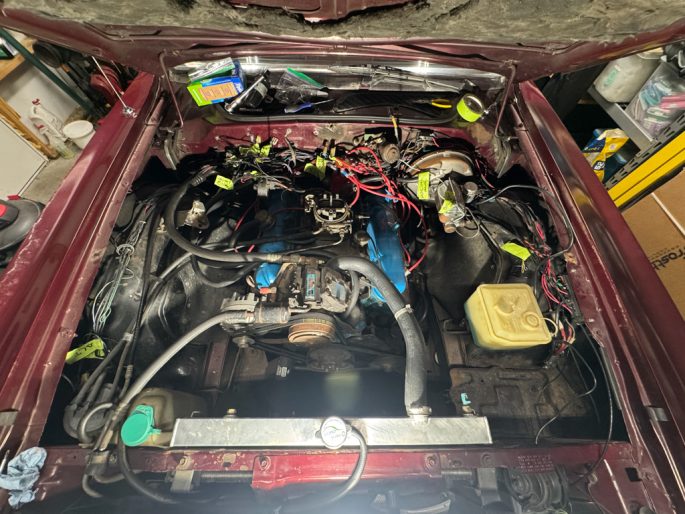
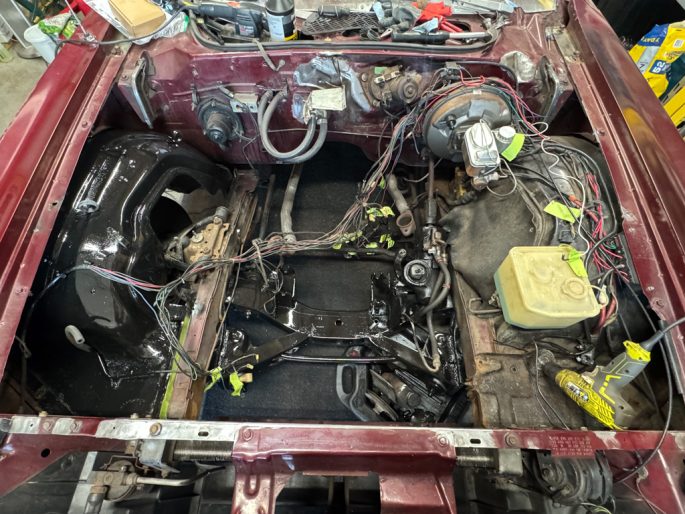
With the engine out, the underhood area got a serious de-greasing and pressure washing. Five cans of foaming de-greaser later and I still had to take a wire wheel to clean some places up.
That cleaning led to the first bit of scope creep: the engine bay. I went nuts with the wire-wheeler and before you knew it, I had stripped a lot of paint out and had ground out a lot of surface rust.
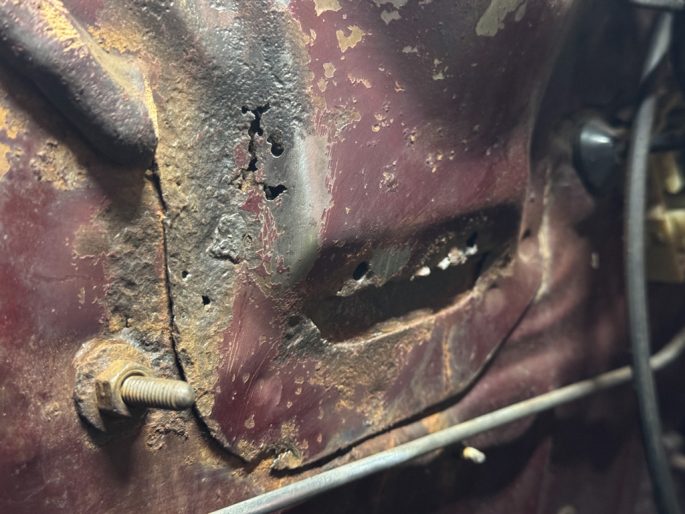
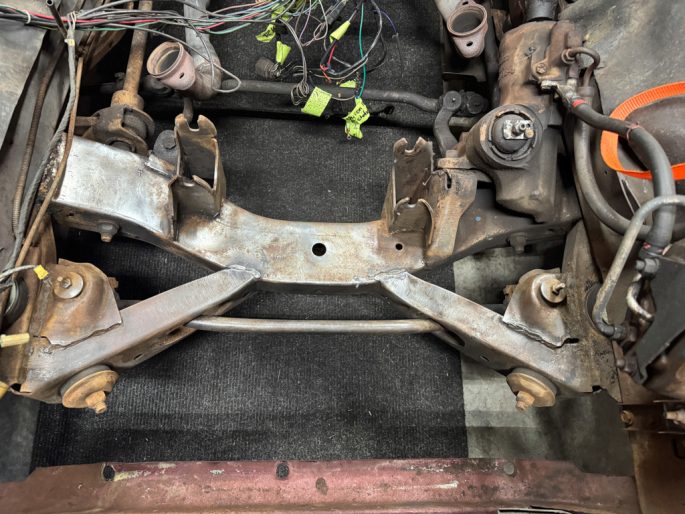
Speaking of rot, here is the only section I found worth mentioning. This is the drain port for the cowl. Raise your hands if you are surprised that this was clogged up with dirt, leaves, acorn shells and pine needles. Yeah, neither was I.
Another shot of the residual “honey” (potting) that drips down from the electronics mounted on the firewall. Every Chrysler I’ve ever worked on has that tell-tale snail trail going on.
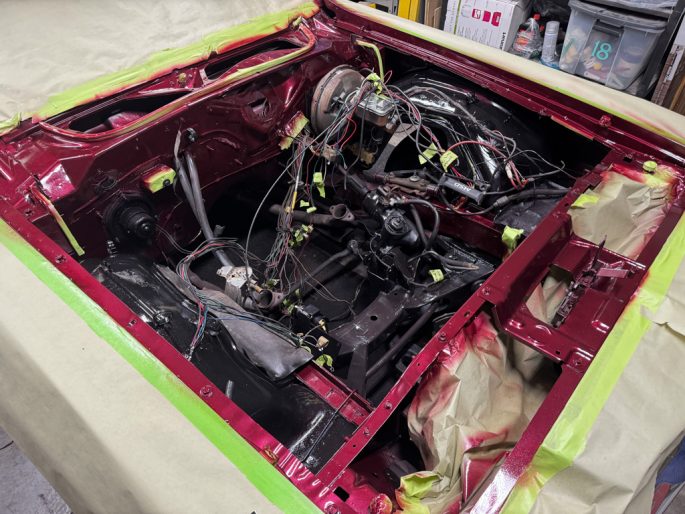
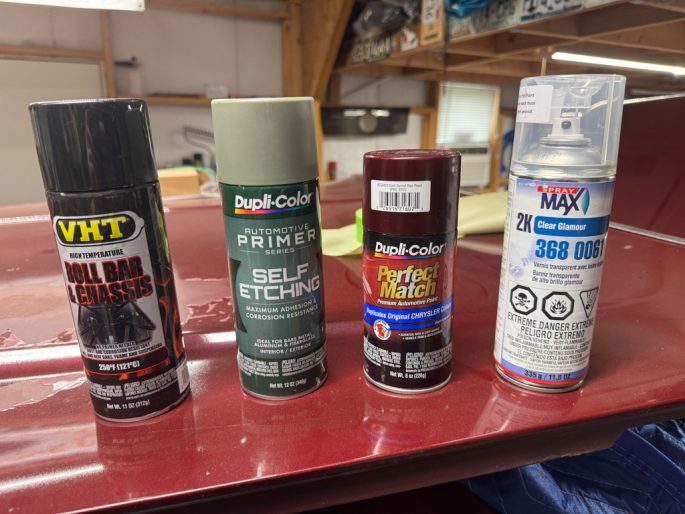
All rattle-can work, too! Everything black is VHT Roll-Bar and Chassis Black. Primer was used anywhere I ground down to bare metal, and the Dupli-Color Perfect Match is a very close match to our Garnet Red (it’s more for a 1990s-2000s car than the 1970s version, which has red metalflake in the mix, but whatever.) The only speciality paint is the clear, which I bought from the local PPG store. It’s expensive, but it’s worth it.

Items like the windshield wiper motor were cleaned up and painted. Once the gasket for the wiper motor arrives, this will be reinstalled.
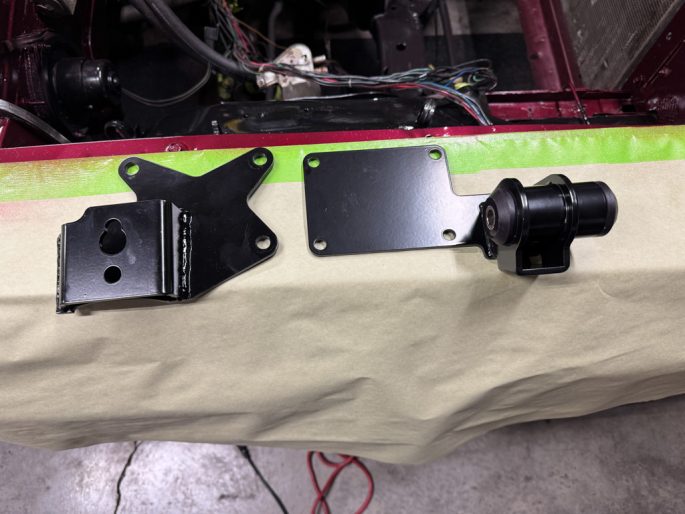
With the paint drying, I started to inspect the swap mount components and hit my first snag. On the right is one of Hooker Blackheart’s BHS531 engine mounts, which is meant for pre-1972 Mopars. On the right is a spool-type swap mount from Schumacher Creative Services, a company who have specialized in engine swaps in Chrysler products for decades. Both can work, and the Hooker design is more common. But for Mopars newer than 1972, the spool-type is more likely the mount you need.

Need To Catch Up?
