

With any build or restoration, whether that’s a car or house, you have to have a good foundation. We spent some time going over this ’57 to assess what it would take to get it going again. Luckily for us, the previous owner had the entire underside sandblasted so it was easy to see what rust it had.
“Budget Bel Air” Part One: How Cheap Can We Build It?
As far as rust goes, this car has extremely minimal amount. The floorboards inside need some work, and a little bit by the tail panel. The rest looked remarkably rust-free. For now, the focus is on the floor pans so we can get those installed and start on other projects.
With the “Budget Bel Air” in mind, we started to see what options there were for floor pans. We actually met a gentleman that had a ’57 and offered us one of the floor pans in exchange for some lunch – score! But that still left the other three. Hopping on eBay we found all four for about $100 or so. But that’s when the going cheap bug bit us hard. These cheap pans were thin and nowhere near the correct shape. We could have cut and welded, cut and welded, then did a little more cutting and welding and probably made them work. But time is money, so we sent them back and ordered good quality ones from a reputable dealer.
The first step is to remove the rust – in order to keep the body and floor as straight as possible we chose to replace one piece at a time. To remove the rust we used our handy dandy angle grinder with a cut off wheel. This makes quick work of it, and cuts nice and straight lines as well. The we trimmed up the new patch panels a bit before tack welding them into place while checking the fitment. From here we repeated the process on the remaining pieces.
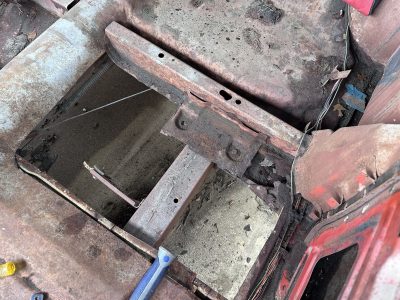

During the process we were able to use one of our favorite tools, our Miller Welding Spectrum 625-Xtreme plasma cutter. We’ve had this one for about 10 years and it still works, and still makes us smile every time we get to use it. Another cool thing happened, my youngest son Maxwell came out to help! He spent a solid hour vacuuming up the inside of the car to get things cleaned up and prepped, it was actually a big help. We shot each panel with some primer to prevent flash rusting before we have a chance to really seal them up.
Before we really start diving into the rest of the car, we wanted to seal the entire underside, and the inside. In order to really seal it up, we literally bought some sealer from our local auto parts store. Is it any better than the caulking you can buy at your local Home Depot or Lowes? Who knows. But we bought it and sealed around every panel on the top, and the bottom as well as we could to prevent water from coming inside.
One of the last prep steps we did was to use a wire cup brush on a drill to brush up any loose rust, then vacuum everything up. What we wanted to use was a POR-15 type product. We ended up ordering some of this “Black Out” from Sweet Patina that is supposed to work even better than the POR-15, but time will tell. The process for it is pretty simple, we sprayed and wiped everything down with their degreaser, then their wax and grease remover.
We opted to roll and brush on the “Black Out” paint sealer. We found it was easier than trying to spray it. There’s nothing special here though, we covered up everything we wanted to seal against rust with. We found it covered well and was easy to apply to the floors with a roll brush. We noticed after putting this stuff down any water that gets inside beaded right up which is a nice sign.

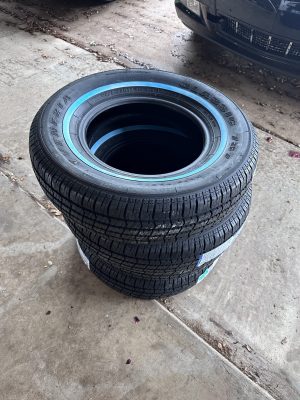
While we were playing around and fixing up the floors, the factory hubcaps we ordered showed up along with a new set of tires. These were about the cheapest tires we could find that were factory sized with a small whitewall on them. But now that the floors are fixed and we have some new rubber, we can get this car to move under it’s own power again!